What is Kuali Build?
Kuali Build is a code-free platform that can assist departments and units with creating applications or electronic forms to replace current paper, PDF forms, etc. With business process management functionality designed into the system, it is a simple way of taking old paper or PDF forms into a digital space, creating an accessible, secure, policy compliant, and mobile-ready application or form.
Who can use Kuali Build?
All University of Missouri-St. Louis faculty and staff can use the platform. Please note that training is required before gaining access to the Kuali application.
What can you do with Kuali Build?
Kuali Build creates efficiencies and streamlines workflow processes with easy-to-use features, including the ability to launch apps in minutes, workflow builder, workflow status reporting, route and manage document approvals, signatures, campus system integrations, and more. Visit Kuali's Best-in-Class Features website for a detailed list of the features that enable you to build, manage, and customize forms with Kuali.
How to request the Kuali Build online training?
Please send us an email to kualibuild@umsl.edu to receive instructions to take the online training.
Additional Resources:
Kuali Build Knowledge Base will give additional information on kuali basics, training videos, app information, form information, gadgets, workflows, and more.
For assistance, questions, or issues with using Kuali Build, contact kualibuild@umsl.edu
To learn more about Kuali Build, visit Kuali Build Resource Library.
For illustrations and examples, see the drop-down lists below.
Kuali Dashboard
Create an App
1. In your Dashboard view, Click + New App icon.
2. A pop-up window will appear that will allow you to name the app and select an icon and color for the app. The icon and color selection will appear on the dashboard moving forward.
3. Click Create. This will bring you to the app's Form Builder page, and you are ready to design your Form (see the Planning and Designing a Form article).


Inside the App
How to Create the Apps Sections
1. After Creating a New App, the Form Builder will appear with 3 panels.
- The Left Panel has the gadgets with which you can create the form.
- The Middle Panel is a preview of the form.
- The Right Panel is the configuration panel.
2. The first thing you will want to add to your form is a Section. Select a Section from the list of gadgets and drag it into the middle panel.
In a Kuali Build form sections act like containers for questions and help you organize your form. You will want to ensure that your gadgets appear inside a section so that they're visible to the user.

3. For all Form Gadgets, including Sections, click into the Gadget Label/Question box in the configuration panel. Type a label for this gadget that will appear on the form. (Although Form Builder Gadgets perform different functions, their initial settings are the same.)
- The Form Preview box in the center panel will show you how the Gadget Label/Question looks.
- You can then type an answer in the Field Preview to see how an answer renders in this field.
In this screenshot example, I typed "Travel Request Documentation" as the Gadget Label/Question.

4. Once you have added your section, select a Gadget, and drag it to the desired location in the Middle Panel. Make sure your gadget is placed within a section!
- For Definitions of each field, see the Form Builder - Gadget Definitions article.
In this screenshot example, the Read-Only Text gadget has been selected.

5. Continue to add items by dragging and dropping the gadgets into the center panel. Make sure they appear in a Section! The form saves automatically as you go, so no need to worry about saving anything.
6. Preview your form by moving the toggle switch just above the middle panel from Design to Preview. Once in Preview mode you will be able to see the form as your submitters will see it. You can also test your fields by beginning to fill out the form to ensure you have the right configurations and gadgets in place.

7. Once the form is complete, click Workflow in the upper right-hand corner to get to the Workflow Builder or click Publish to publish and share the form.
Inside the App - Workflow Tab
How do I create a new workflow?
Workflow is an important part of every app. A Workflow determines what happens to a document once a form is filled out, including what approvals need to occur and any notifications that should be generated.
You can configure a Workflow by navigating to the Workflow Builder from the top right side of the app tool bar.

What steps can be added to a Workflow?
- Approval - approval of a course, program, form, etc.
- Task - Add a task step that needs to be completed in or outside of Build
- Acknowledgment - allows a user or role to acknowledge a form's submission
- Notification - a configurable email sent to a selected user
- Branch - proposal routing based off conditions from the form
- Integration - allows you to select from a list of pre-configured integrations if any were created during implementation.

How Do I Add Steps to a Workflow?
- Click on the step you would like to add from the top left side of the Workflow screen.
- Drag and drop the step in the desired location.
- Determine the settings for the step in the configuration panel that pops up on the right side of the screen.
- Your workflow step will save automatically by Kuali Build. No need to click a Save button.

How Do I Edit a Step?
- Click anywhere in the box of the step you would like to edit. (The step you are editing will be outlined in dark gray.)
- Edit the step in the configuration panel on the right.
- Your workflow step will save automatically by Kuali Build. No need to click a Save button.

How Do I Remove a Step?
- Click anywhere in the box of the step you would like to delete. (The step you are deleting will be outlined in dark gray.)
- Click Delete Step in the configuration panel on the right.
How do I undo a previous command?
It is now possible in the Workflow Builder to easily undo a previous command without having to start over. To undo your previous action, you have 2 options:
Click the Undo button on the left side of the screen just under the list of workflow steps.- Use the following shortcuts:
- Windows: control - Z
- Mac: command - Z

How Do I Redo a Previous Command?
It is also possible to reverse the effect of your previous Undo command. To redo your previous action, you have 2 options:
- Click the Redo button on the left side of the screen just under the list of workflow steps.
- Use the following shortcuts:
- Windows: control - shift - Z
- Mac: command - shift - Z
How Do I Copy and Paste a Step in Workflow?
Often as you're creating steps in a Workflow, you may find a need to copy a Workflow step and make minor modifications to the copied step. This is possible in Build! You will find the instructions for doing this below.
Note: This also works between apps as well! In order to copy a Workflow step from one app to another, open a separate tab or window in the same browser, and you will be able to copy steps between two different apps.
- Windows:
- Click on the Step in the Workflow
- Press control - C
- Then select a different step (or leave that step selected), and press control - V. The workflow step you copied will be pasted directly after the one you selected.
- Mac:
- Click on the Step in the Workflow
- Press command - C
- Then select a different step (or leave that step selected), and press command - V. The workflow step you copied will be pasted directly after the one you selected.
How Do I Publish an App?
Until you publish your app and as long as the yellow Draft flag is visible at the top left of the screen within the app:

Any changes you have made to your app will not be visible to submitters.
To publish your app click on the Publish button at the top right of the page

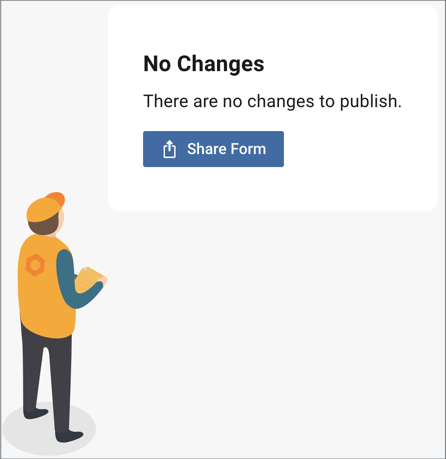
First Publish
If this is your first time publishing, more than likely you won't have any errors to correct, and you will see a screen similar to the picture below.
Please note, you have the option to select 'Show saved drafts in Document List' only on the first publish of an app. This allows app admins to view documents started in the app but not yet submitted and the end user will receive a prompt on their initial save informing them that admins can see their drafts. After this first publish you can no longer change this setting to enable or disable the view of unsubmitted drafts.

Also, please refer to the How and Where to Test Your App Before Going Live article for some guidance and best practices when deploying an app.
Publishing Updates
If you have previously published your app and are making changes to it, the Publish page will display a summary of changes you have made to this draft, and it will show any errors that need to be corrected.
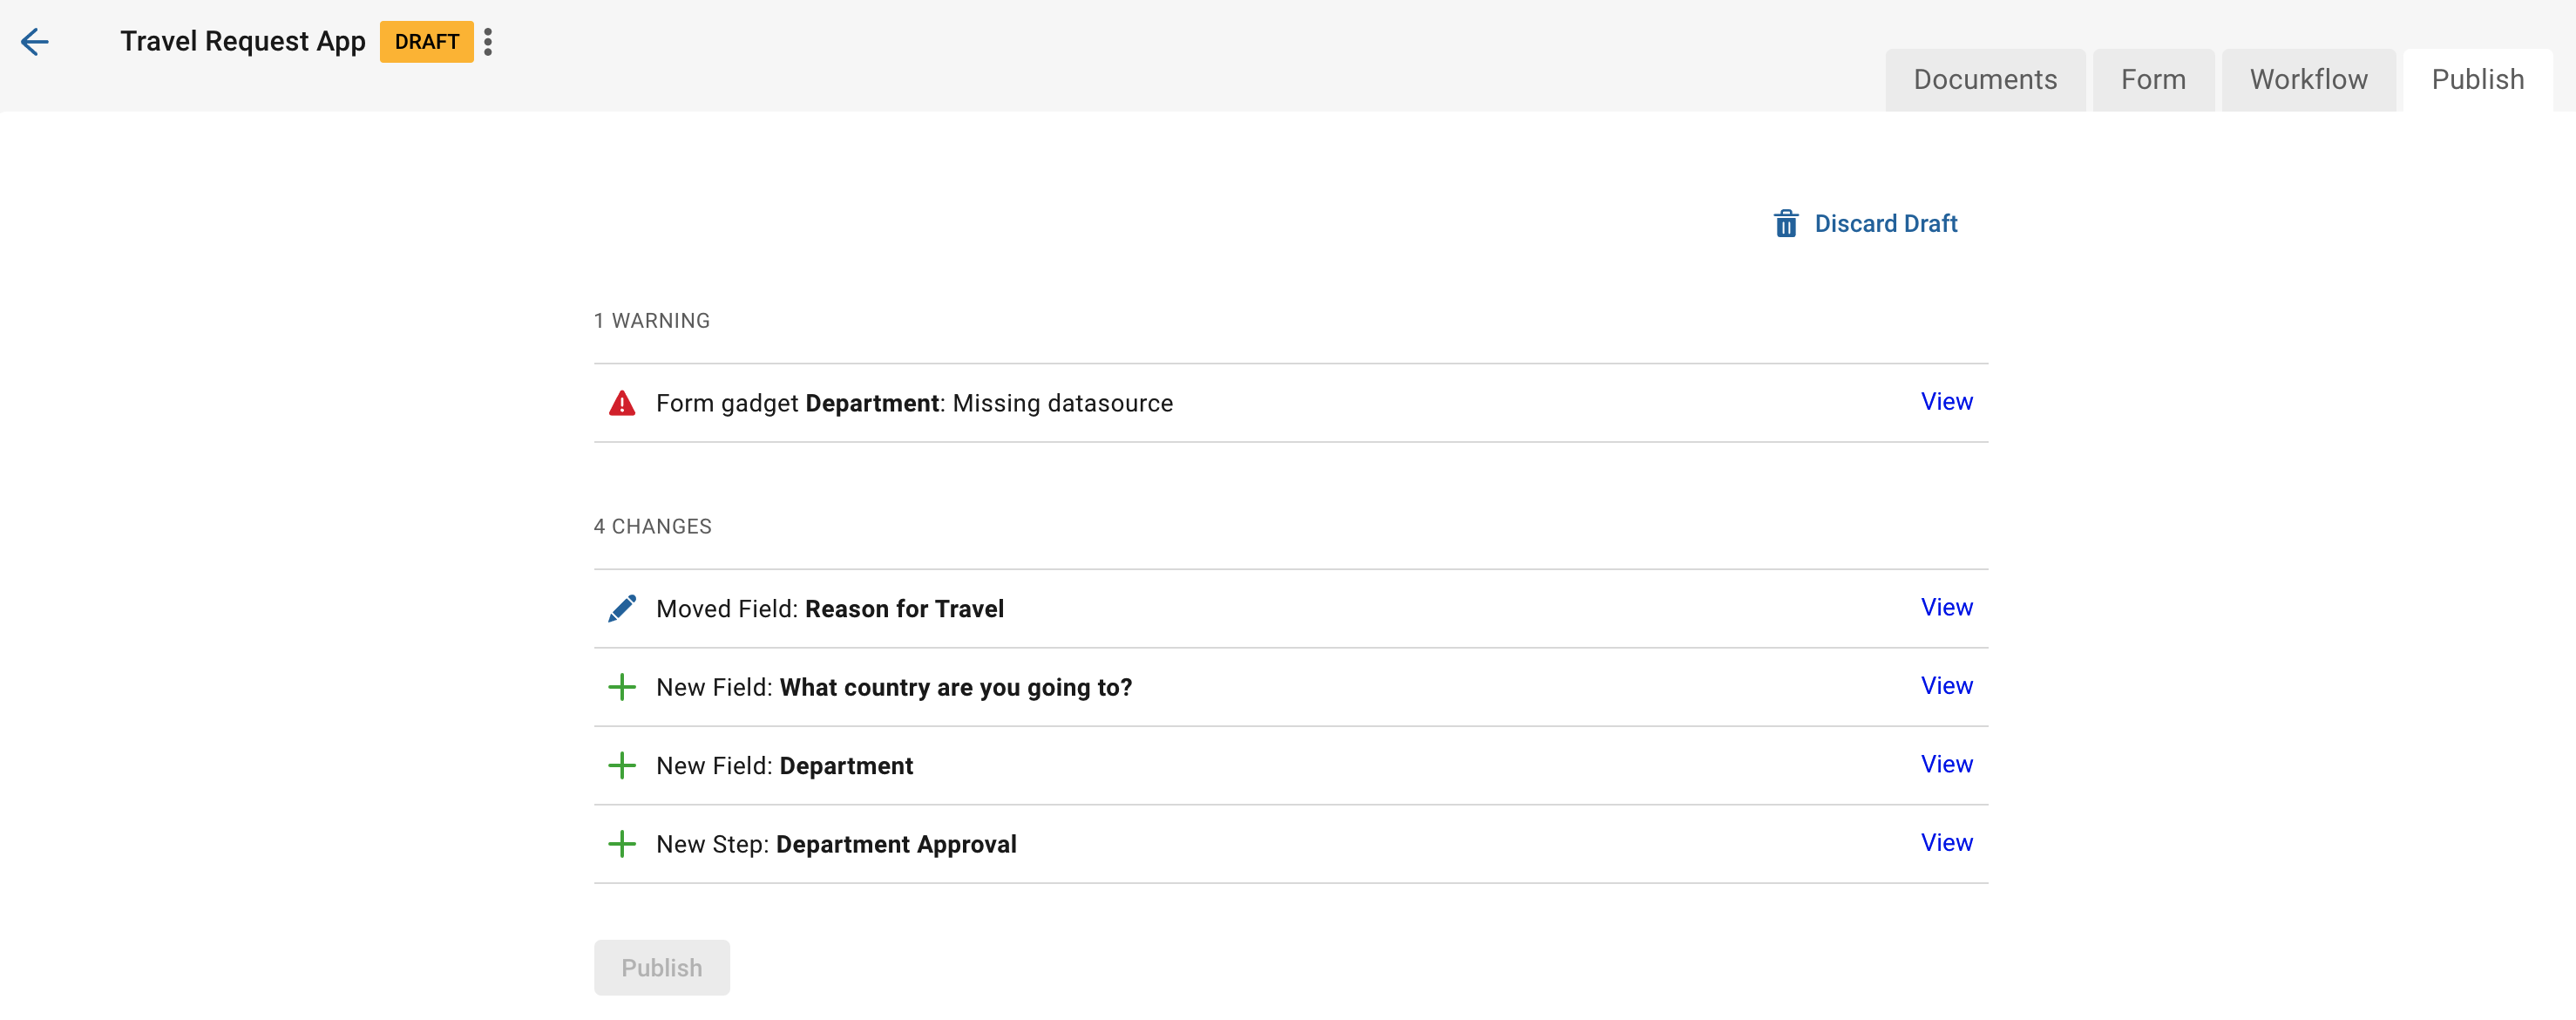
Until all errors are resolved, you will be unable to publish your app.

Please note, any form/workflow changes that are published for an app will only be applied to new documents going forward and any draft documents that had never been submitted. For draft documents, users will get the below prompt to update their form the next time they enter the document. Please be aware that fields removed from the form will then be removed from the document when applied.
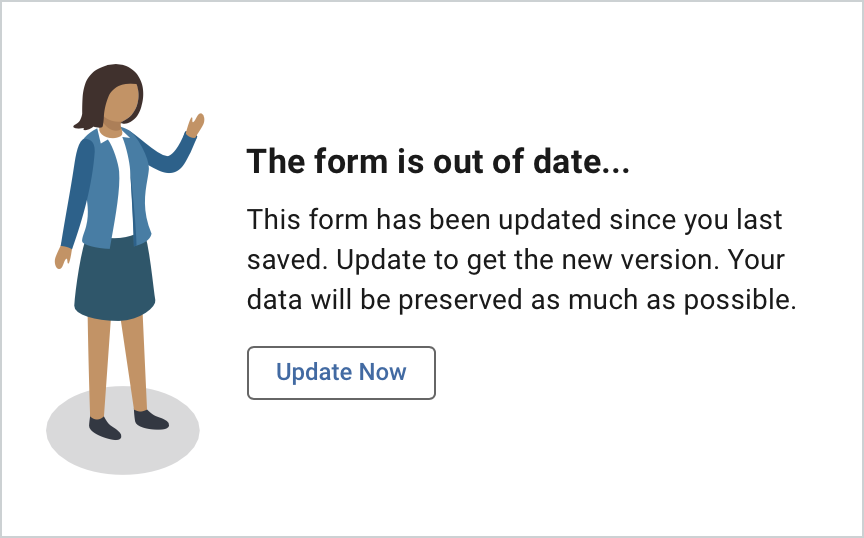
If the document had already been submitted at any time prior to these changes being published (even if the document was returned) it will not update to the new form/workflow but remain on the published version it was originally associated.
What steps do I need to take to ensure my users can submit a form?
Even though you have published your app from the publish page, your form may still not be visible to your users. To ensure your users can see your form, make sure you take the following actions:
- Click the Publish button from the Publish screen in your app.
- Adjust your app permissions to ensure your users have the form shared with them. See the App Permissions article for more information.
- Share the link to your form. See the Sharing an App/Form article for more information.
Once those three things are done, your users can begin submitting forms.
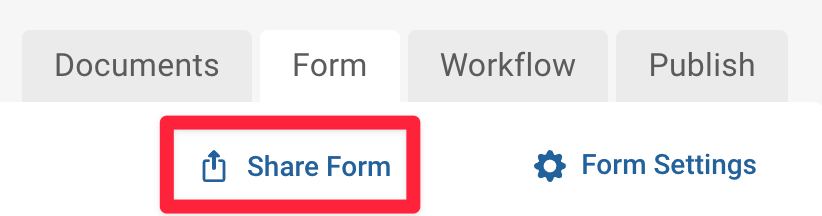
How Do I Share an App/Form?
Once you have published your app and are ready to share the form with your team, you can share directly from the Publish screen or from the Form Builder. (Note: The locations for accessing the Share Form links have changed.)
To share from the Publish screen, click Share Form.
To share from the Form Builder, click Share Form on the right side of the page below the Publish button.
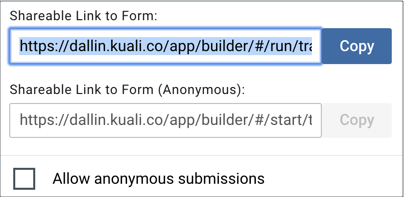
From the lightbox that appears you will have access to 2 shareable links.
- Shareable Link to Form: Share this URL with authenticated users so they can link directly to the form. For example, add this link to a portal for authenticated users.
- Shareable Link to Form (Anonymous): Share this URL to link directly to the form. This option does not require a user to be authenticated to fill out the form. In order for you to use this option, make sure you have checked the box at the bottom of the lightbox to Allow anonymous submissions. Clicking the 'Allow anonymous submissions' will also click the ‘Create documents in this app’ option for Anonymous Users section of the app Permissions and vice versa.
- Note: If your form uses gadgets that pull information from the Kuali Users and Groups area or from an external integration, that information will not be available to an anonymous user for security reasons. Form submitters must login to the form to view that information.
What is the Document List?
The Document List is a repository of all the documents created and submitted from an app. A form when filled out and submitted is now a document filled with data and is ready to manage.
What Options are Available in the Document List Toolbar?

- Search: Allows you to search for specific documents or specific fields within documents.
- Sort: Allows you to sort your Document List according to the criteria you determine. You can also sort in ascending or descending order. Electing to sort in one way will clear any previous sorts.
- Columns: Where you can adjust which columns are visible or not visible in your Document List. For more information see the Adding Columns in the Document List article.
- Views: Allows you to save selected filters and columns in a report of sorts so you can easily check back later, reset to the default view, and view saved views.
- Data Settings: Where you can configure the default settings for the Document List, including the columns that are visible and how they are sorted. If the column and sort get reset or someone new is invited to the app, these settings will define how the list will appear.
- Export All: Allows you to export all the data from all documents into a CSV file. Additionally, you can export the data for one document in a plain text file by going to that document's page and clicking Export on the right side of the page.
- Share: Provides a shareable link to allow other users to view your saved filters in the Document List. Your users will see the view, the columns, and the filters you're seeing at the time you use the share link. Only people who have access to the app and the data will be able to view the content. Access and permissions can be adjusted in the app permissions section (see App Permissions).
- New: Will take you to a blank form.
Send us an email at kualibuild@umsl.edu.
If you need addition help with creating form, managing the form, workflow, and more.
Kuali gives a great explanation on each word and their definition to help you understand how to use each one in the forms and workflows.
Additional FAQs for anything that may have been missed in the other two categories.