Use iPhone/ iPad/ iPod touch to scan a form/document
You can use the Notes app to scan documents and add signatures on your iPhone, iPad, or iPod touch.
Scan a document with iPhone/iPad/iPod touch
1. Open Notes and select a note or create a new one
2. Tap the Camera button, then tap Scan Documents
3. Place your document in view of the camera. Lay your document on a flat surface. Make sure the document is flat and not folded. Do not hold your document.

4. If your device is in Auto mode, your document will automatically scan. If you need to manually capture a scan, tap the Shutter button or one of the Volume buttons. Then drag the corners to adjust the scan to fit the page, then tap Keep Scan. Make sure you can see the whole document.
5. Tap Save or add additional scans to the document
Sign a document with iPhone/iPad/iPod touch
1. Open Notes, then tap the document in the note
2. Tap the Share button, then tap Markup
3. Tap the Add button, then tap Signature and add a saved signature or create a new signature. Then you can adjust the size of the signature box and place it wherever you want on the document
4. Tap Done
*** Notes: For forms/documents that request a parent signature, the signature must be provided by the parent. Proof of signatures may be required.

TIPS: To manually sign your document, follow steps 1-2, then select a tool to use and sign the document with your finger or an Apple Pencil with a compatible iPad.
Use an Android phone to scan a form/document through Google Drive
You can scan Financial Aid / (Cashier) forms / documents to save them as searchable PDFs on your Google Drive.
Scan a document using Google Drive
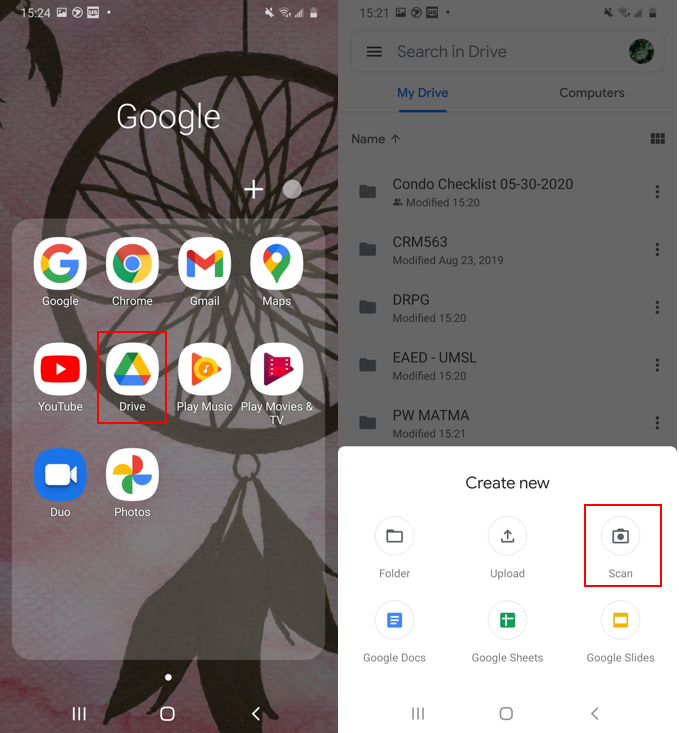
1. Open the Google Drive app
2. In the bottom right, tap Add
3. Tap Scan

4. Take a photo of the document you'd like to scan.
- Adjust scan area: Tap Crop
- Take photo again: Tap Re-scan current page
- Scan another page: Tap Add

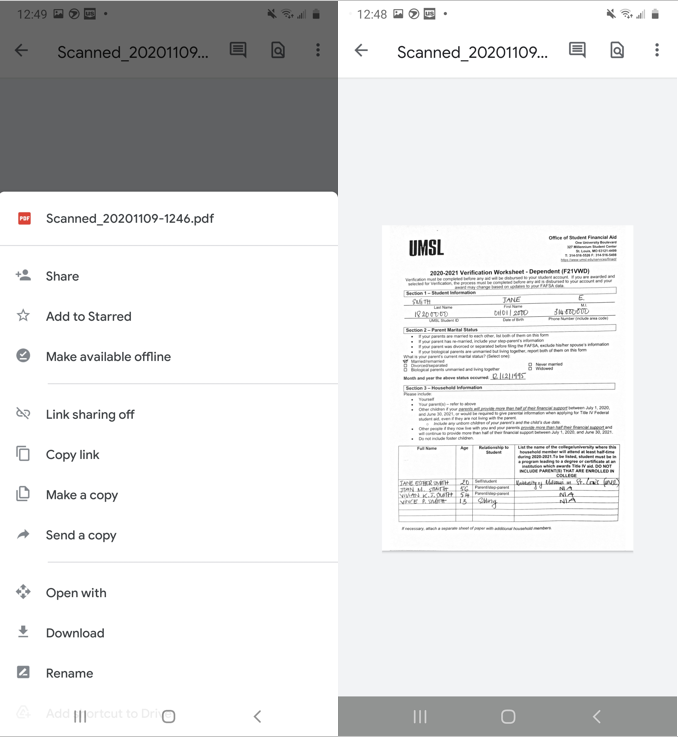
5. To save the finished document, tap Done