Checking PDF Accessibility Yourself
Once you have acquired a license for Adobe Acrobat Pro from ITS you may consult the following checklist to review a PDF for accessibility.
WebAIM’s tutorial on PDF Accessibility is an excellent accompaniment to the current checklist.
The accessibility tools required are not visible by default. If you click "All tools" the required tools are contained in "Prepare for accessibility." Instructions for this checklist will reference this method of reaching the associated accessibility tools.
If you would like to add the accessibility tools to your customizable toolbar there are two ways to add the accessibility tools to your toolbar.
1. Select "Menu" in the top left corner > View > Show / Hide > Customize Toolbar.
2. Select the ellipsis button at the bottom of the tool bar > Customize Toolbar.
Once in the menu to customize your tool bar you will search for Prepare for Accessibility, check the following: Autotag Document, Autotag Form Fields, Accessibility Full Check, Set Alternate Text, and Reading Order. Then Select Add to Toolbar and Save.
NOTE: Even when following best practices, modifying PDFs can have unpredictable results. Saving multiple versions and saving often is recommended!
Step 1. Does the Document Have Text?
How to test: Try selecting text using a mouse, or select all text using Edit > “Select All” from the Acrobat menu.
If No, this is an image file and is not accessible. Covert to text using View > Tools > “Recognize Text.”
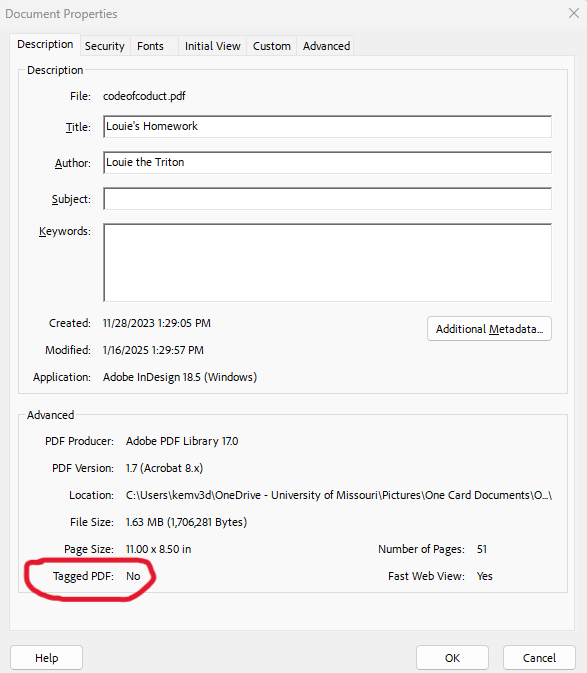
Step 2. Is the Document Tagged?
How to test: Go to File Properties (Ctrl+D in Windows, Command+D in Mac). In the bottom left corner of the Document Properties dialog, see the “Tagged PDF” field.
If No, this document needs to be tagged. Tags provide the structure on which accessibility is built. You can automatically add tags by selecting All tools > Prepare for accessibility > Automatically tag PDF.
Auto-tagging an untagged PDF document can have unpredictable results. One potential outcome is an error where autotagging progress stalls at 20% completion. Note that inspecting the tag tree after auto-tagging is recommended. For more details on this topic, see Tagged PDF.
Step 3. Check for Lingering Errors.
How to test: Run the accessibility checker that is built in to Acrobat Pro. Select All tools > Prepare for accessibility > Check for accessibility.
In the Tool Bar select Accessibility Full Check then read the report and follow the prompts.
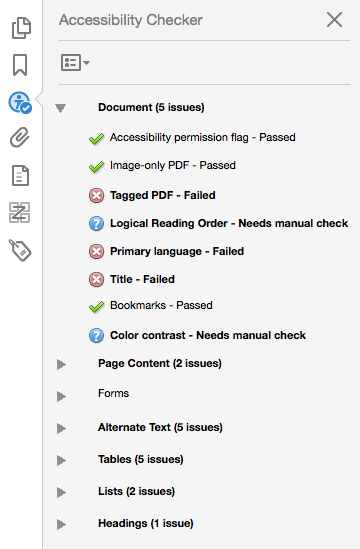
The report lists items in various categories such as Document, Page Content, etc. Each item is preceded by an icon indicating that the item either passes, fails, or requires manual inspection. Right-click on any item to see a list of options for fixing the problem or learning more about it.
This is the final step in our checklist, rather than the first step, because some documents generate dozens of errors that can easily be addressed with the first two steps. This way, the accessibility checker will report fewer problems and will be easier to read and work with.
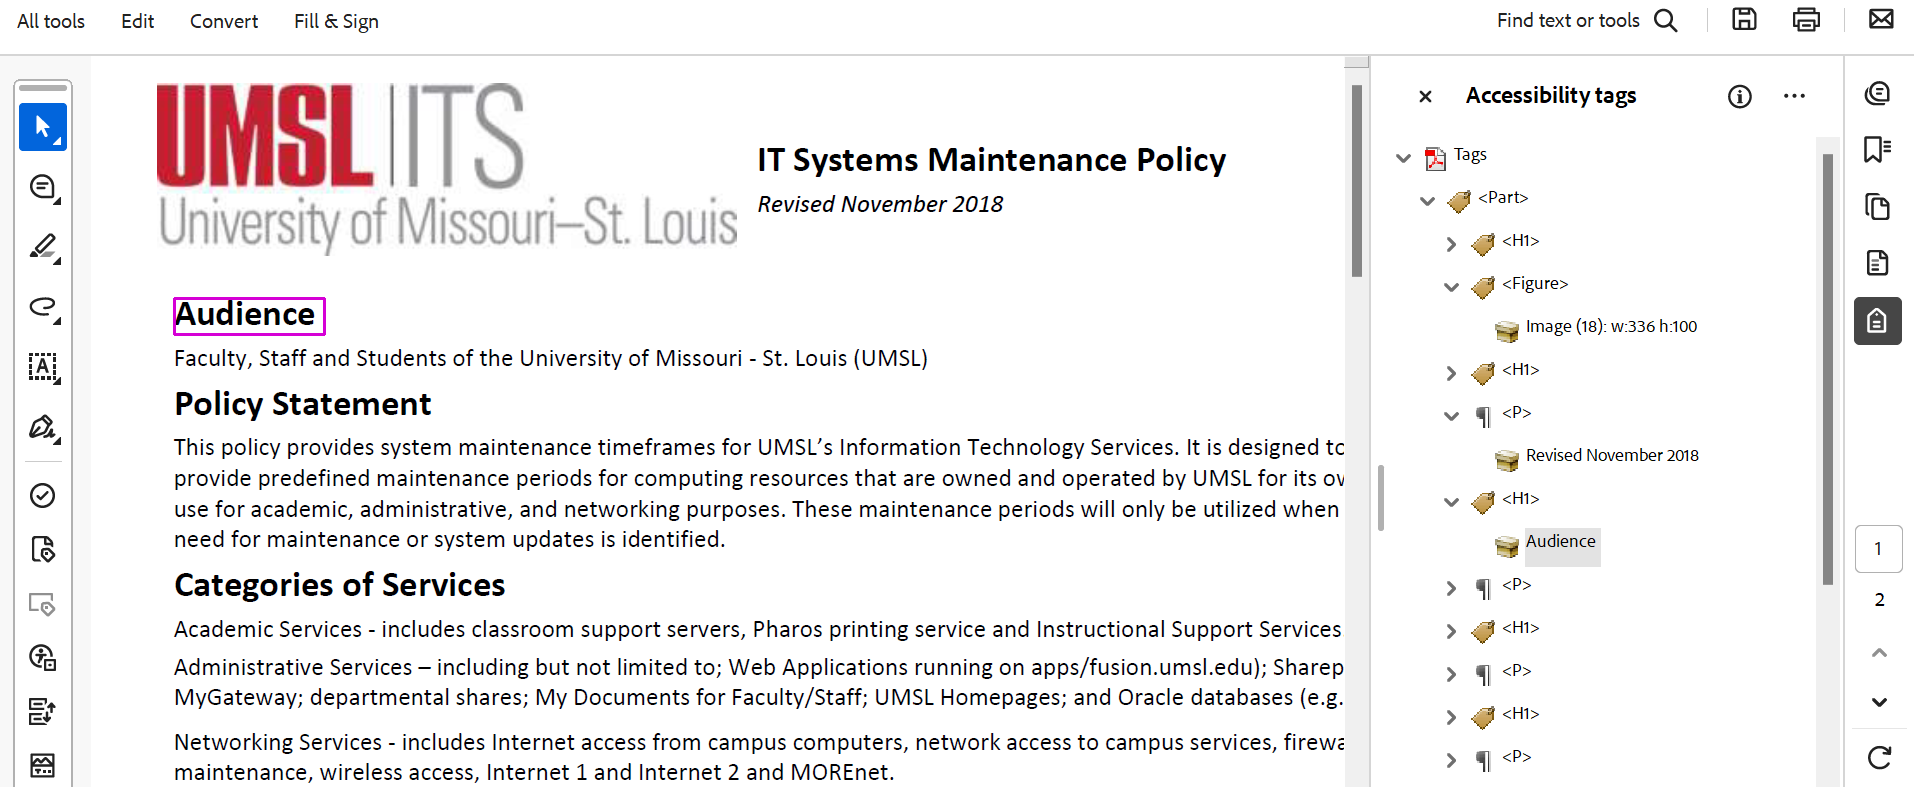
Tag tree
To manually inspect the tag tree in Adobe Acrobat Pro, select Menu > View > Show/Hide > Side Panels > Accessibility Tags. This will display the tags in descending order from top to bottom. Visually inspect the tags to make sure the heading level structure is correct and elements are tagged accurately. For details, see Adobe’s Accessibility Repair Workflow for PDFs using Acrobat DC.