Tables should be used for presenting rows and columns of data, not for layout, and column and row headers should be explicitly identified.
Techniques
To make tables accessible in a Canvas page, following the following two steps.
Step 1. Identify the Header Row.
- In the Canvas page editor, click on (or arrow to) the table that you want to edit.
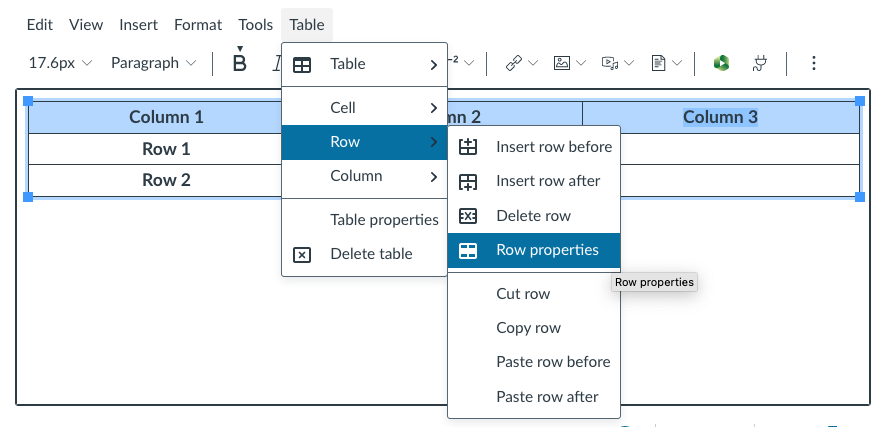
- From the menu bar in the rich content editor, select Table > Row > Row Properties.
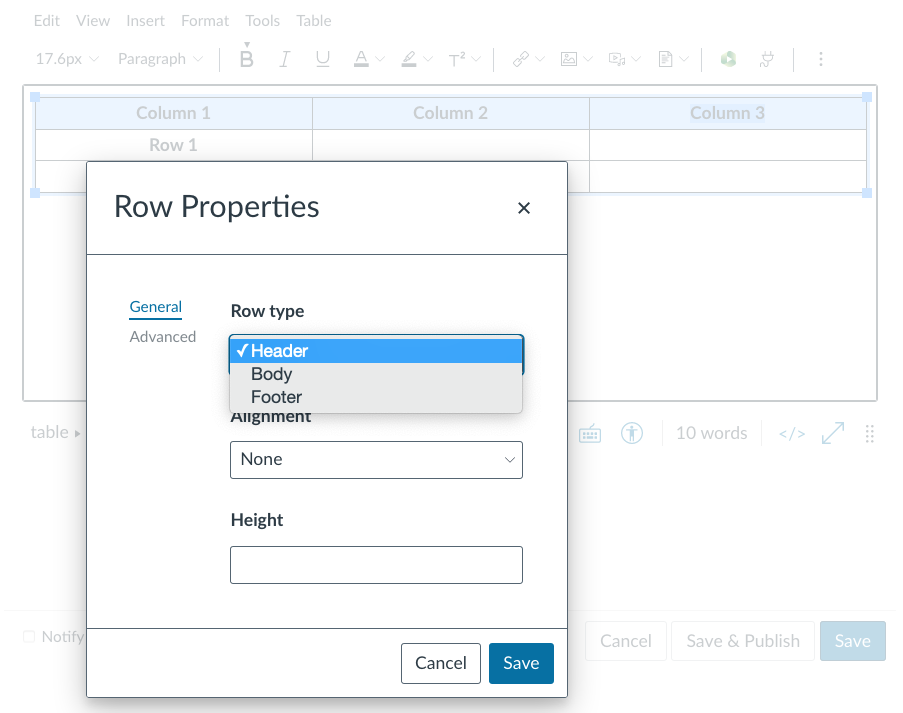
- In the Row Properties dialog, select “Header” as the Row type.
- Save.
This has the effect of wrapping the header row in a <tbody> element in HTML.
Step 2. Identify Each Individual Header Cell
- In the Canvas page editor, click on (or arrow to) a column header or row header.
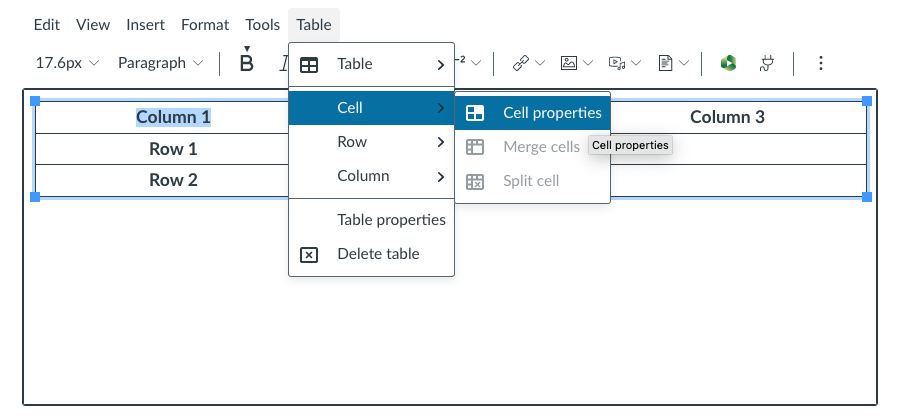
- From the menu bar in the rich content editor, select Table > Cell > Cell Properties.
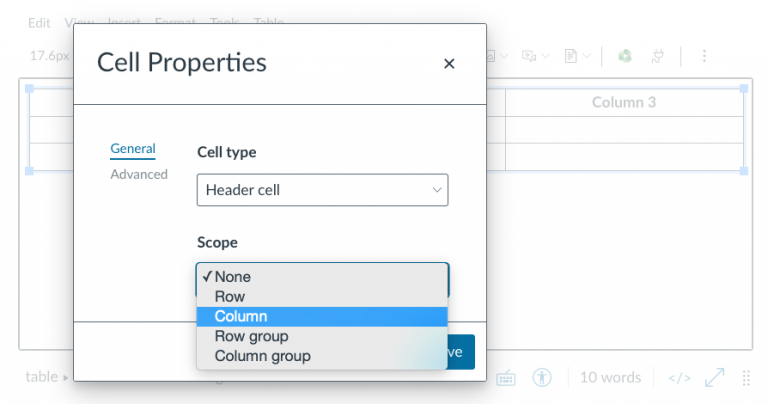
- In the Cell Properties dialog, select “Header” as the Cell type.
- In the same dialog, select “Column” or “Row” as the Scope. The dialog also provides “Column Group” and “Row Group” as options; select either of these options if the header cell spans multiple rows or columns.
- Save.
This has the effect of tagging the table cell as a <th> element in HTML, with a scope attribute.